Japan is among the most visited countries for Filipino travelers, and it isn’t difficult to understand why. There’s so much to love about Japan that its proximity to the Philippines is just a bonus. Even our team has visited The Land of the Rising Sun over a dozen times.


The country has a good mixture of ancient tradition and modernity that makes for a memorable travel experience. With a total of 47 prefectures, it is packed with countless stunning landscapes, an excellent culinary scene, a rich history, and hospitality like no other. One thing is for sure: you’ll end your trip wanting for more.

Another thing travelers love about Japan is the convenience it offers. One, its train system connects every major city, making many attractions easily accessible. Two, it is never short of accommodation and food options. Another thing that Japan made more convenient in recent times is their immigration procedures. They now have Visit Japan Web for a smoother arrival clearance at the immigration area.
In this article, we’ll guide you on how to accomplish your Visit Japan Web and how you can use it for your trip to Japan.
What is Visit Japan Web?
Visit Japan Web is a website that allows travelers going to Japan to pre-register the necessary information for immigration procedures. Once you register, you will get a QR code that you can use for immigration clearance and customs declaration. With this, you can go through the arrival process quicker, saving you a lot of time. Tourists can also use this service to create a tax-free QR code that they can use when making tax-free purchases at eligible stores.
How to Register for Visit Japan Web
1. Create an account.
Go to Visit Japan Web site. You can do this on your mobile device or your computer. Click “Sign up” for a new account at the bottom of the page.
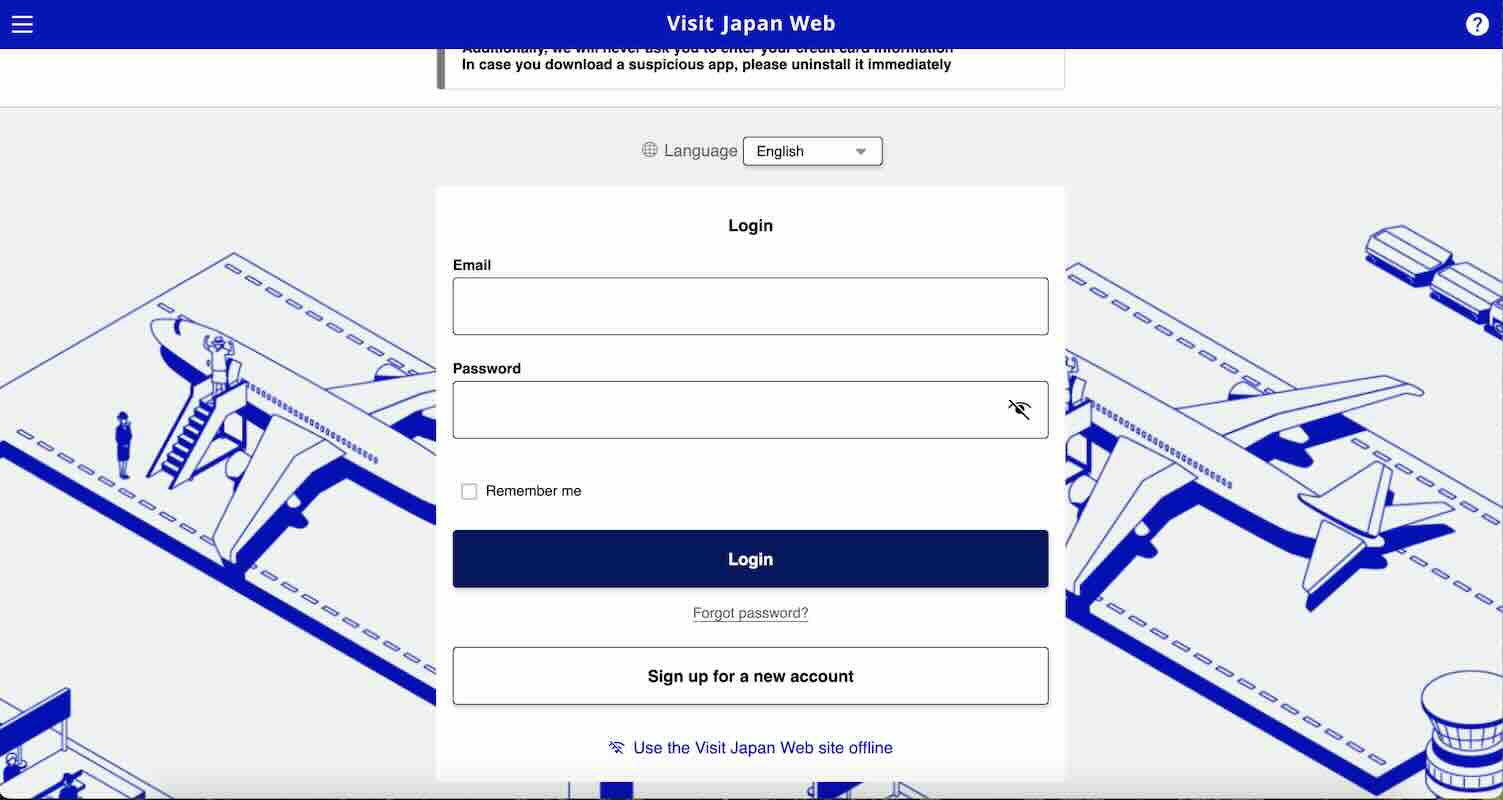
Then, read the Terms of Use and Privacy Policy. Tick the boxes to agree and click “Next” to proceed.
2. Enter account details.
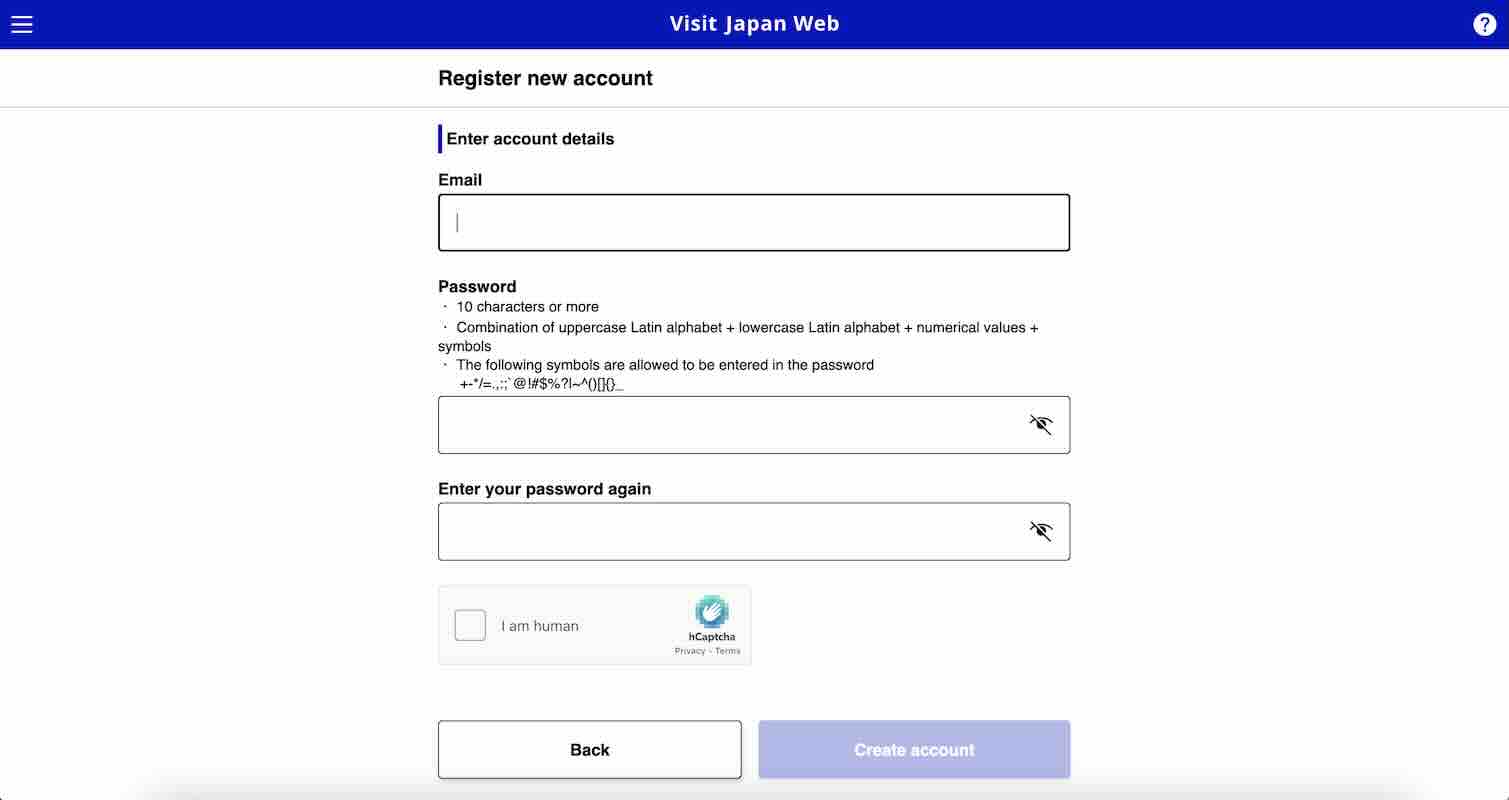
Type in your email address. Make sure that it’s a working email address that you can access since a confirmation will be sent here. Then, create a password and make sure it meets the following criteria:
- Has 10 characters or more
- Has both uppercase and lowercase letters
- Has numerical values
- Has one or more of these symbols: +-*/=.,:;`@!#$%?|~^()[]{}_
Re-enter your password and complete the captcha. Then, click “Create account”.
3. Confirm email.
A confirmation code will be sent to the email address you used to register. Check your email and enter the code. Then, click “Confirm email”.
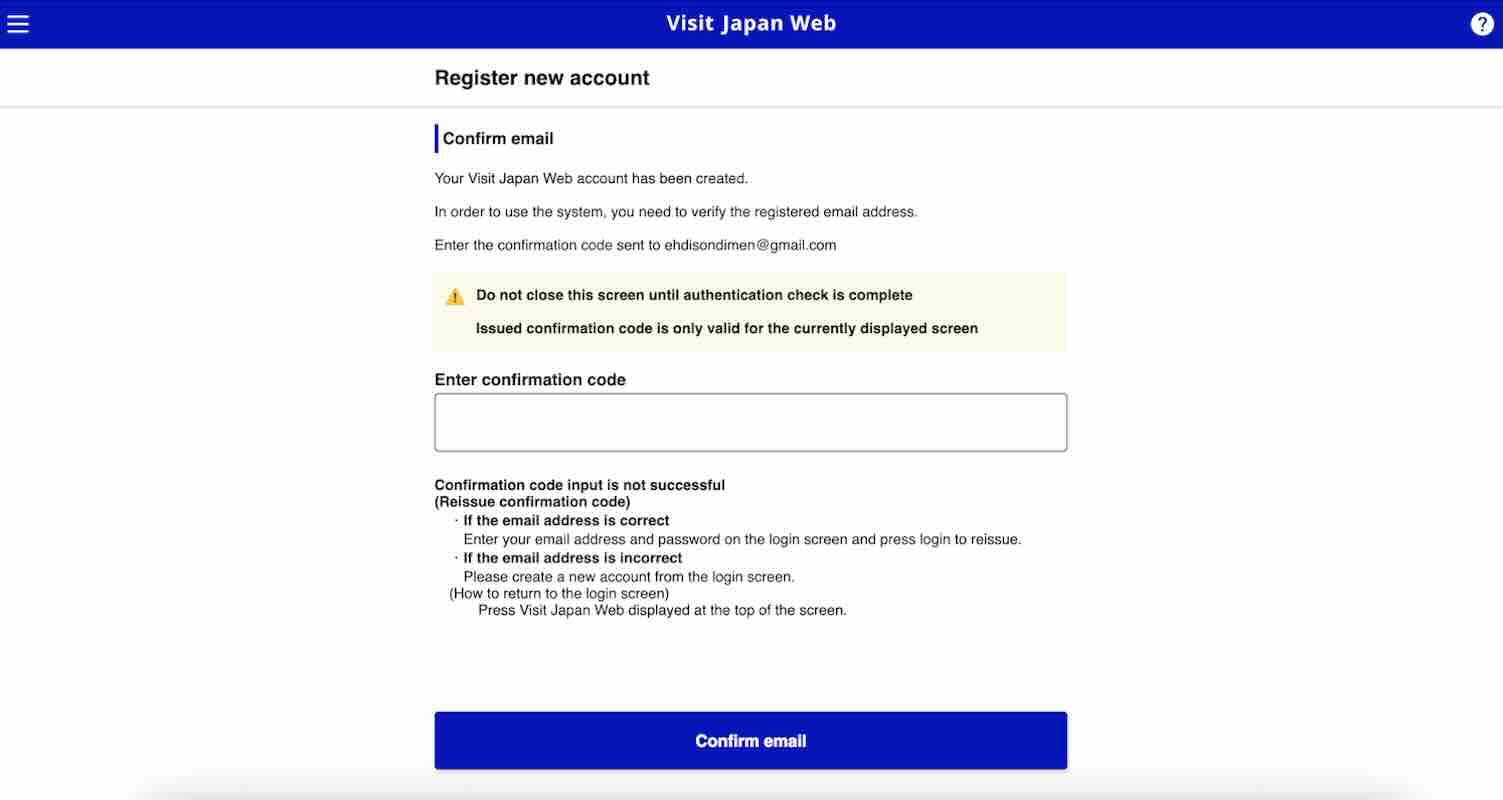
If the confirmation is successful, a pop-up window will appear with that message. Click “Go To Login Screen”.
4. Login to your account.
Enter the email and password you registered and click “Login”.
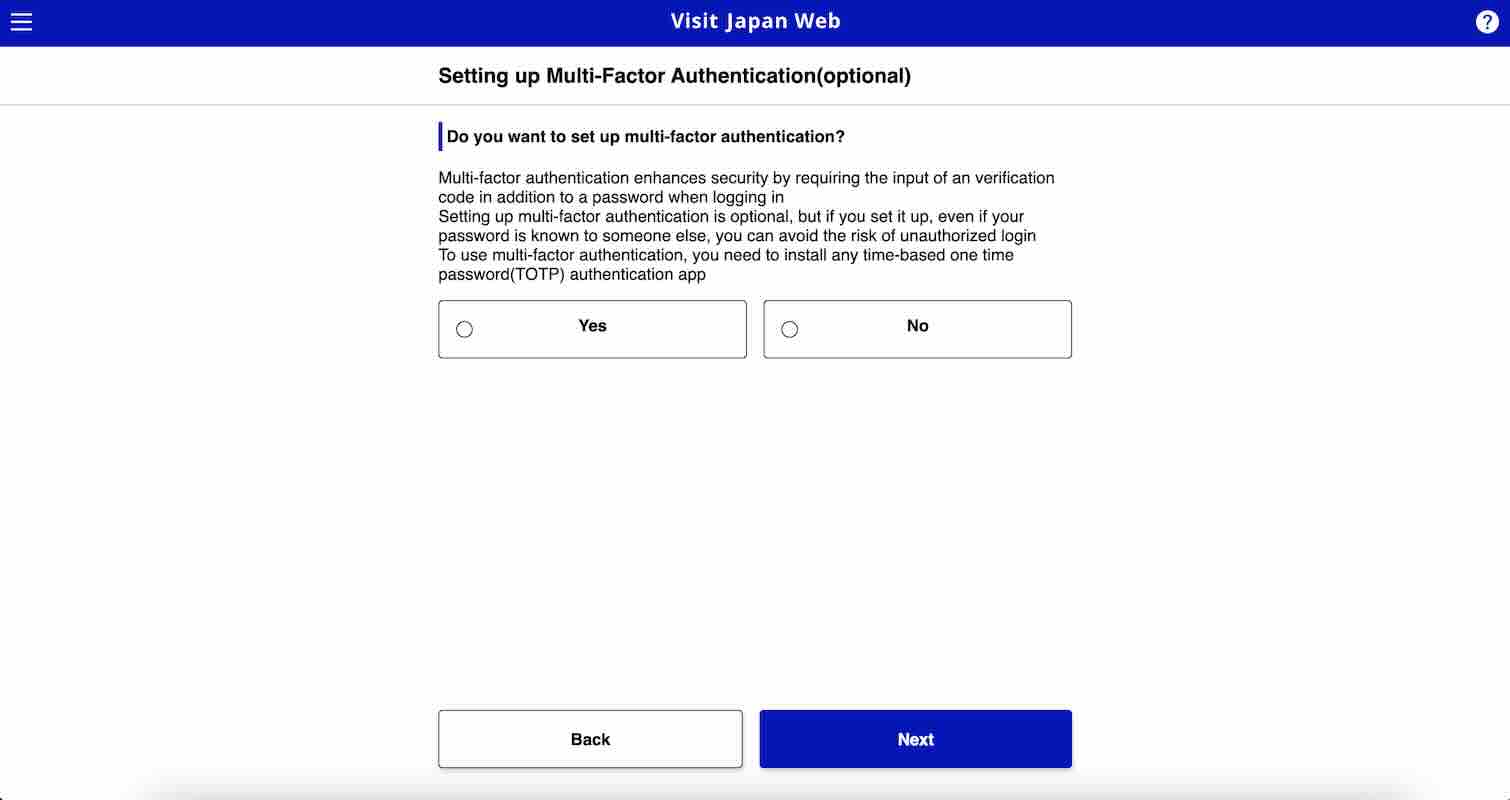
After this, you can opt to set up multi-factor authentication. This will give you extra security to your account. But note that choosing to set up multi-factor authentication will require you to install an authentication app like Google Authenticator or Microsoft Authenticator.
If you don’t want to use multi-factor authentication, click “No”. Then, click “Next”.
5. Choose your entry/return procedure category.
Click “Your details” to start entering your personal information.
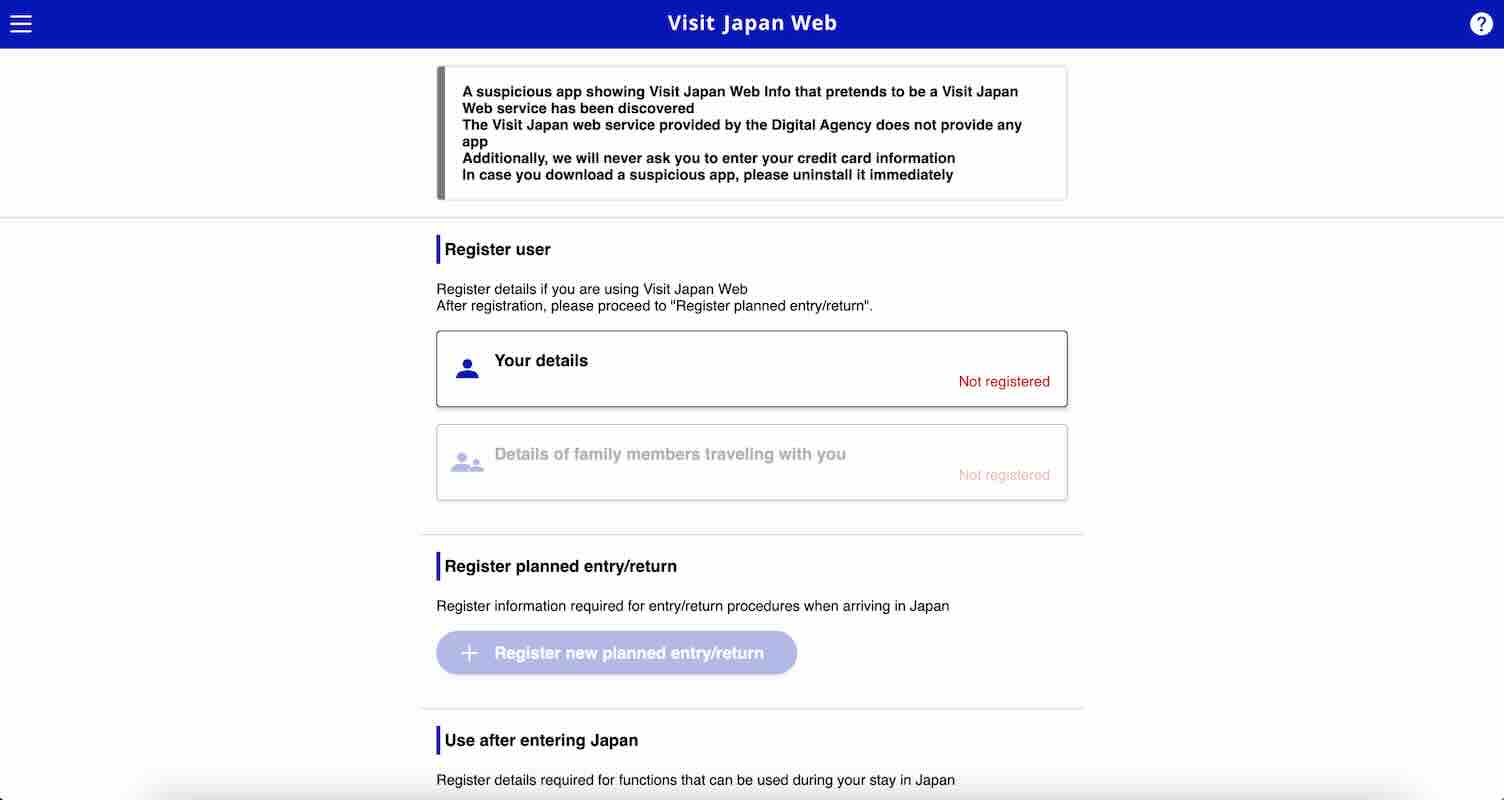
On the first page for this section, you’ll answer the following questions for the entry/return procedure category:
- Do you have a passport issued by the Japanese government?
- Do you live in Japan and will re-enter Japan with a (special) re-entry permission?
If you’re a tourist, your answer to both these questions will most likely be “No”. Then, proceed to answering whether you’ll use a tax-free QR code or not. After that, click “Next”.
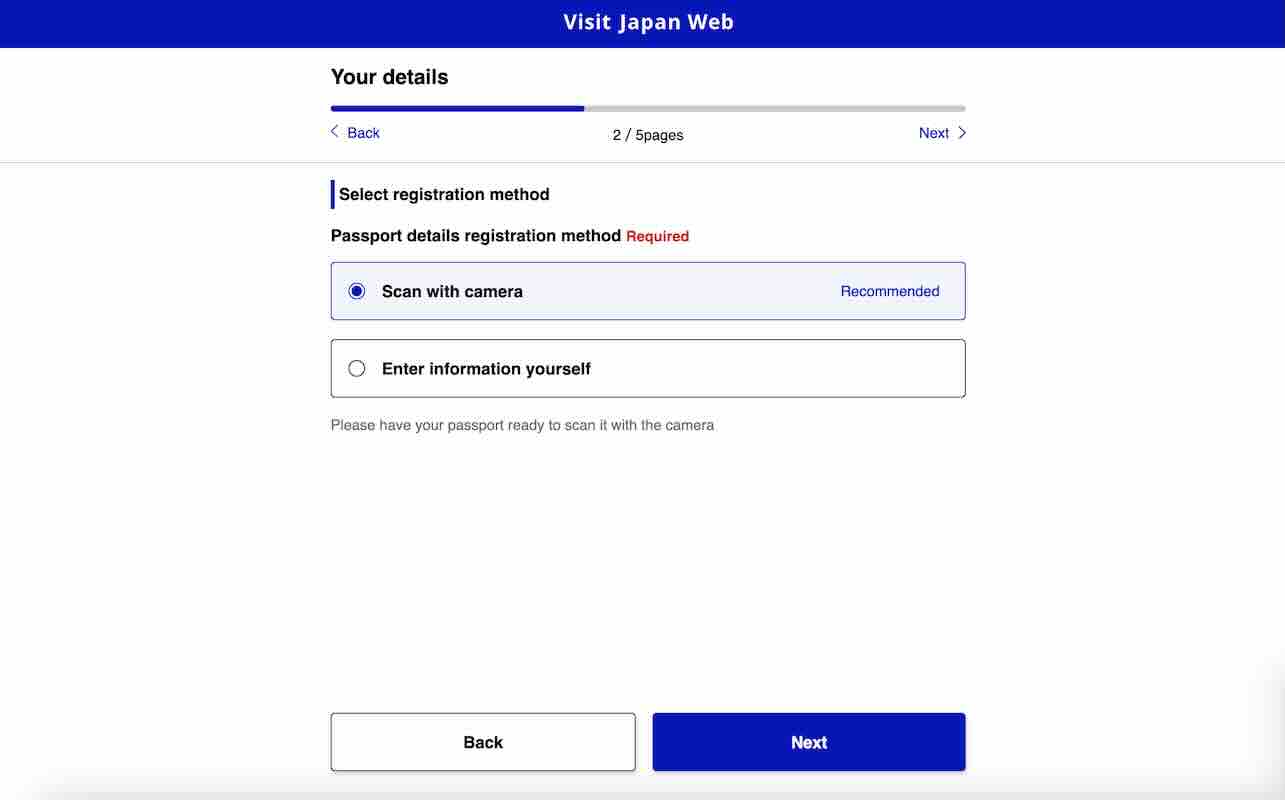
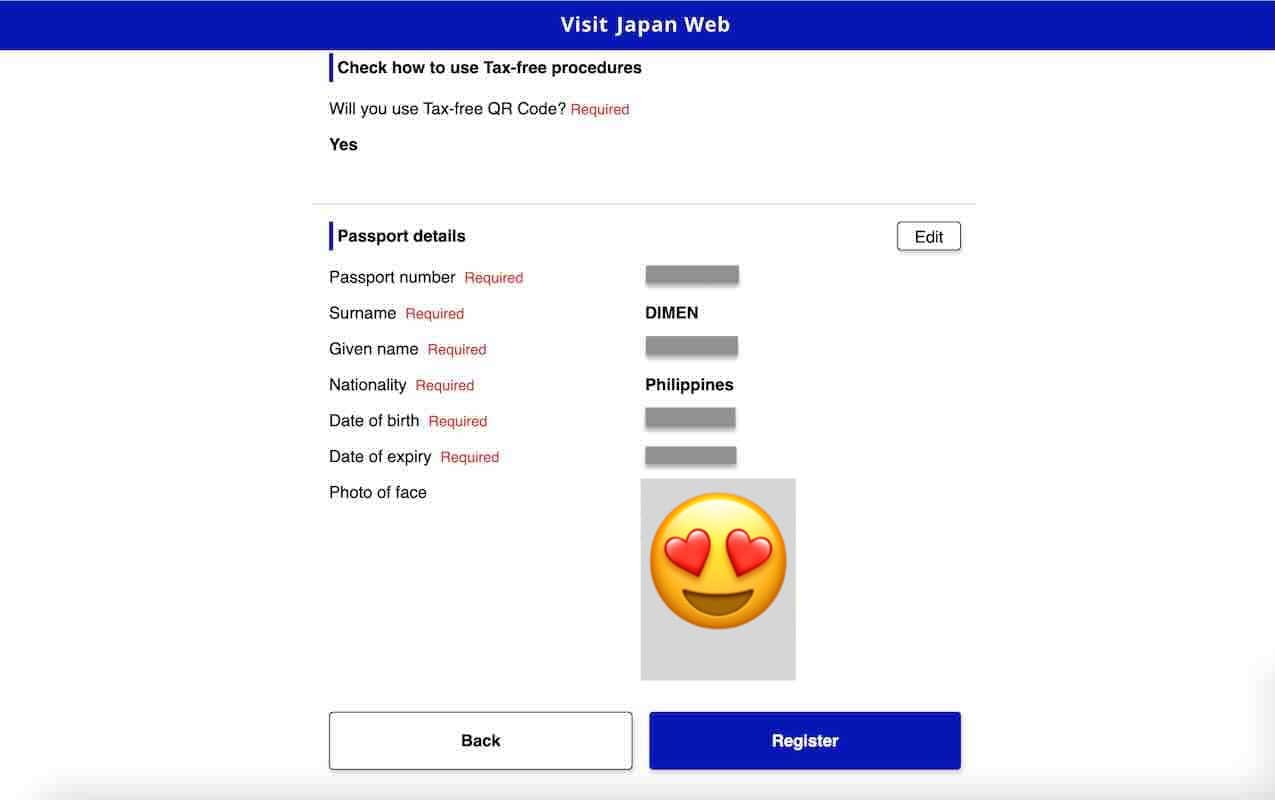
6. Register passport details.
Make sure to have your passport with you when you do this step. You have two options to register your passport details: scan with camera and manually entering the information. Choose which method you prefer, then click “Next”.
If you’re entering the information manually, here are the details you would need to provide:
- Passport Number
- Surname
- Given Name
- Nationality
- Date of Birth
- Date of Passport Expiry
Once you’ve successfully entered all the details, click “Next”.
7. Confirm the details you entered.
In this page, you’ll see a summary of all the details you provided. If there’s any mistake, just click the “Edit” button on the right side of the section you need to edit. If everything is correct, click “Register”.
8. Check visa details.
Upon successful registration, you will see a pop-up window telling you so with a prompt to check whether you need to apply for a visa. Click “Check VISA requirement”.
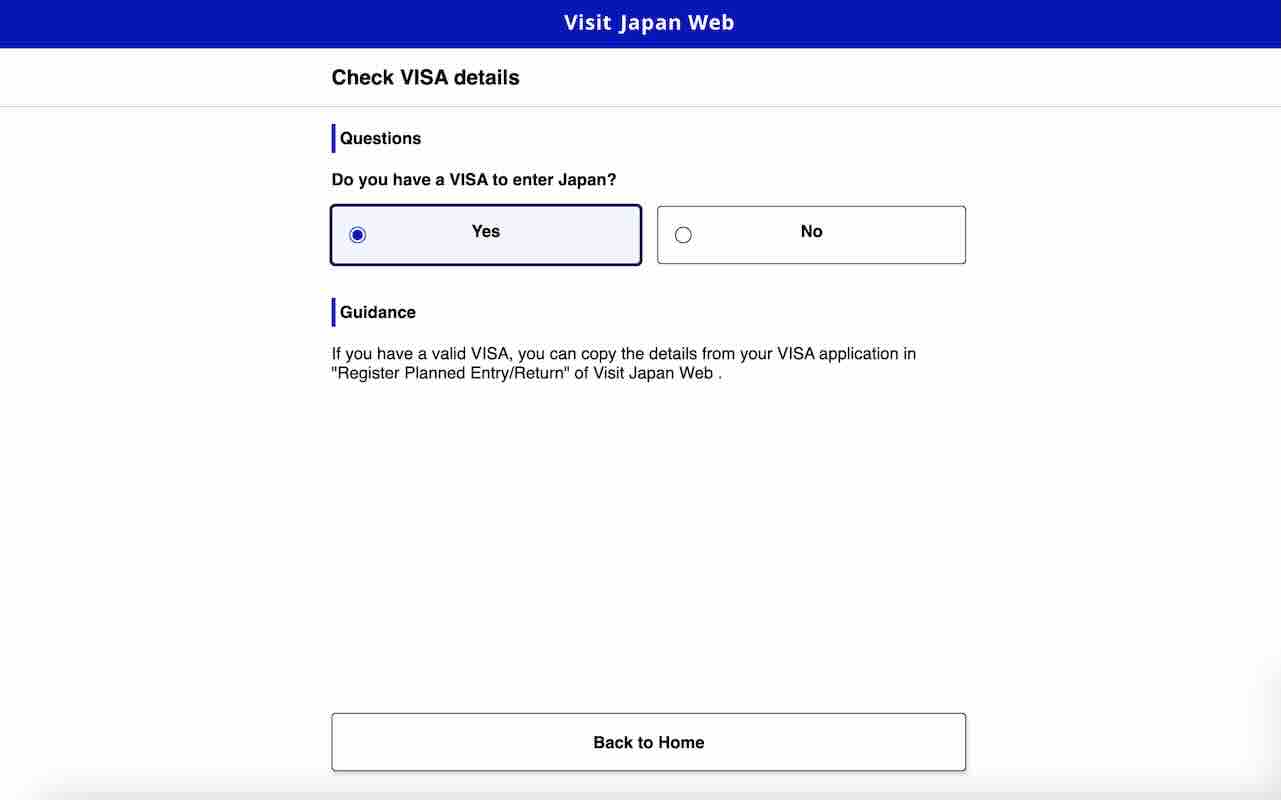
Then, click “Yes” to confirm if you have a VISA to enter Japan. After that, click “Back to Home”.
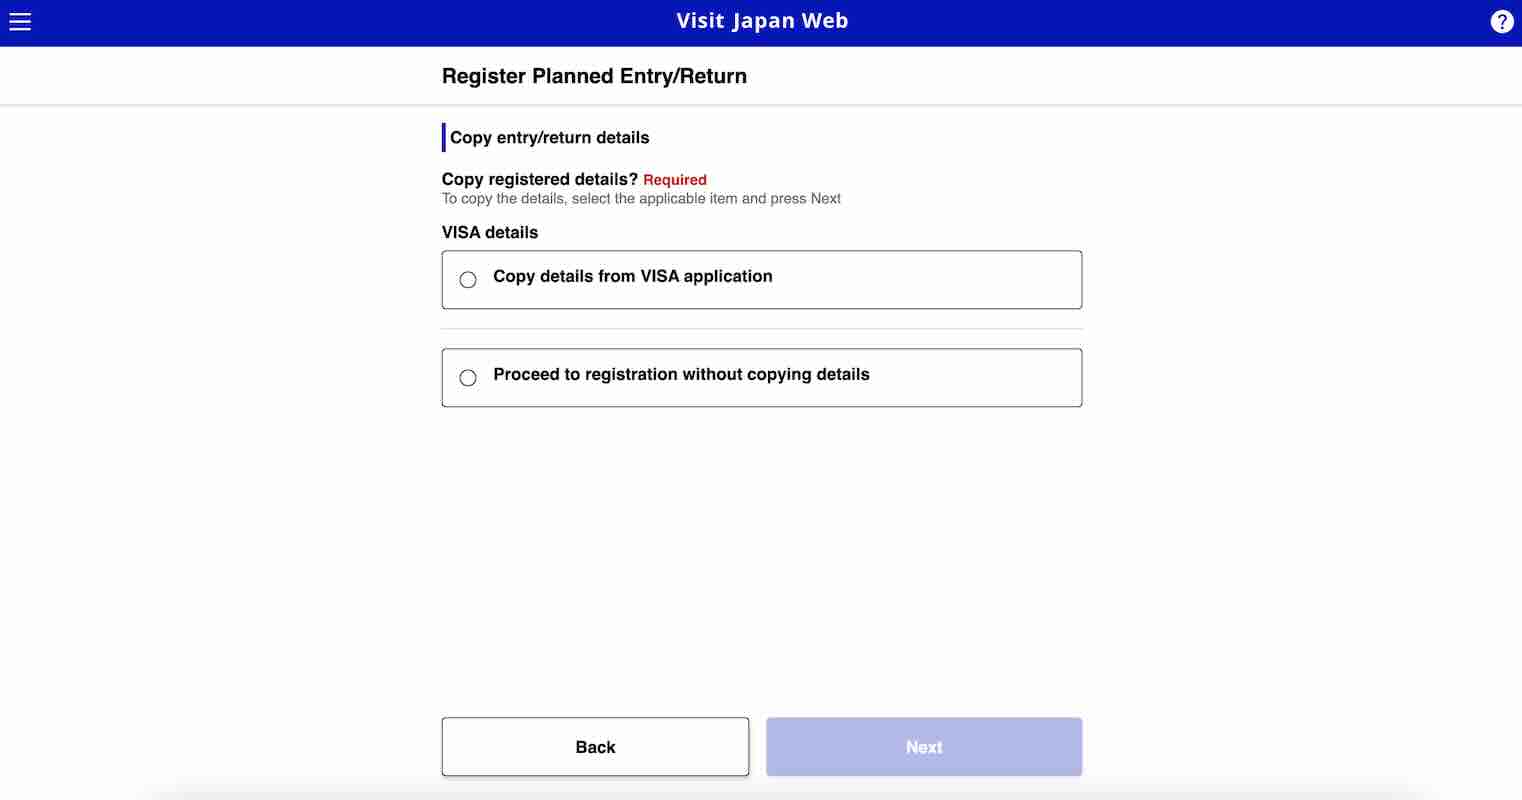
9. Register Planned Entry/Return.
On the homepage, click “Register new planned entry/return”. You can choose to copy the details of your trip from your visa application or enter the details manually.
If you choose to copy the details from your visa application, you’ll need to enter your visa issue number.
Meanwhile, if you opt to enter your details manually, here are the fields you need to accomplish:
- Trip Name
- Planned Arrival Date in Japan
- Airline Name
- Flight Number
After completing all these details, click “Next”.
On the next section, you need to enter the address of your accommodation in Japan. Here are the details you’ll need to provide:
- Prefecture
- City
- Address
- Hotel Name
- Contact number
Once you’re done entering all the necessary details, click “Confirm entered details”.
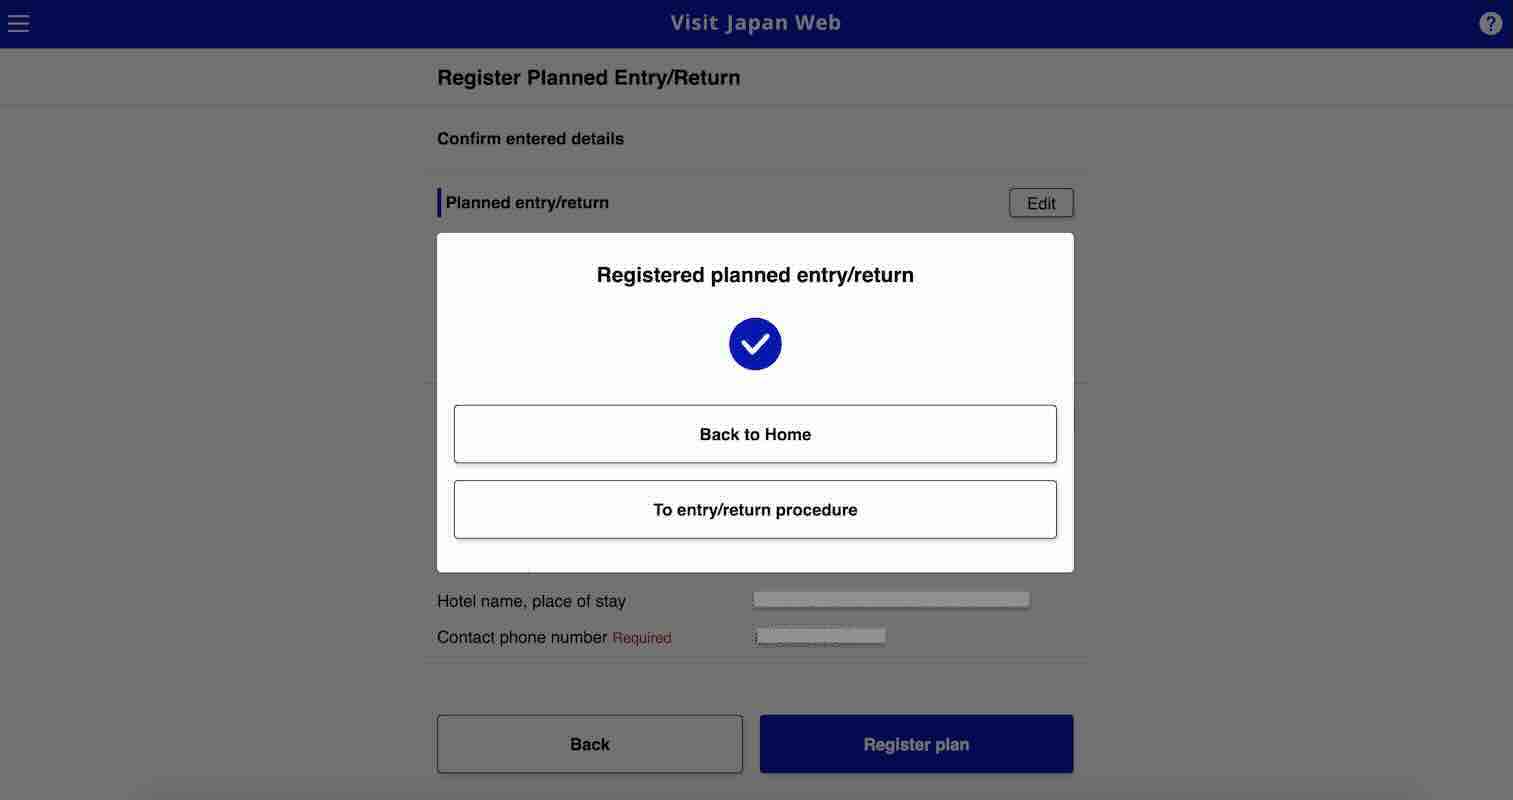
Then, on the pop-up page, click “To entry/return procedure” to proceed to the next step.
10. Generate QR code for immigration clearance.
On this page, you’ll see that you can also link your visa here, but that’s optional. We’ll skip that process here and proceed to the preparation for immigration clearance.
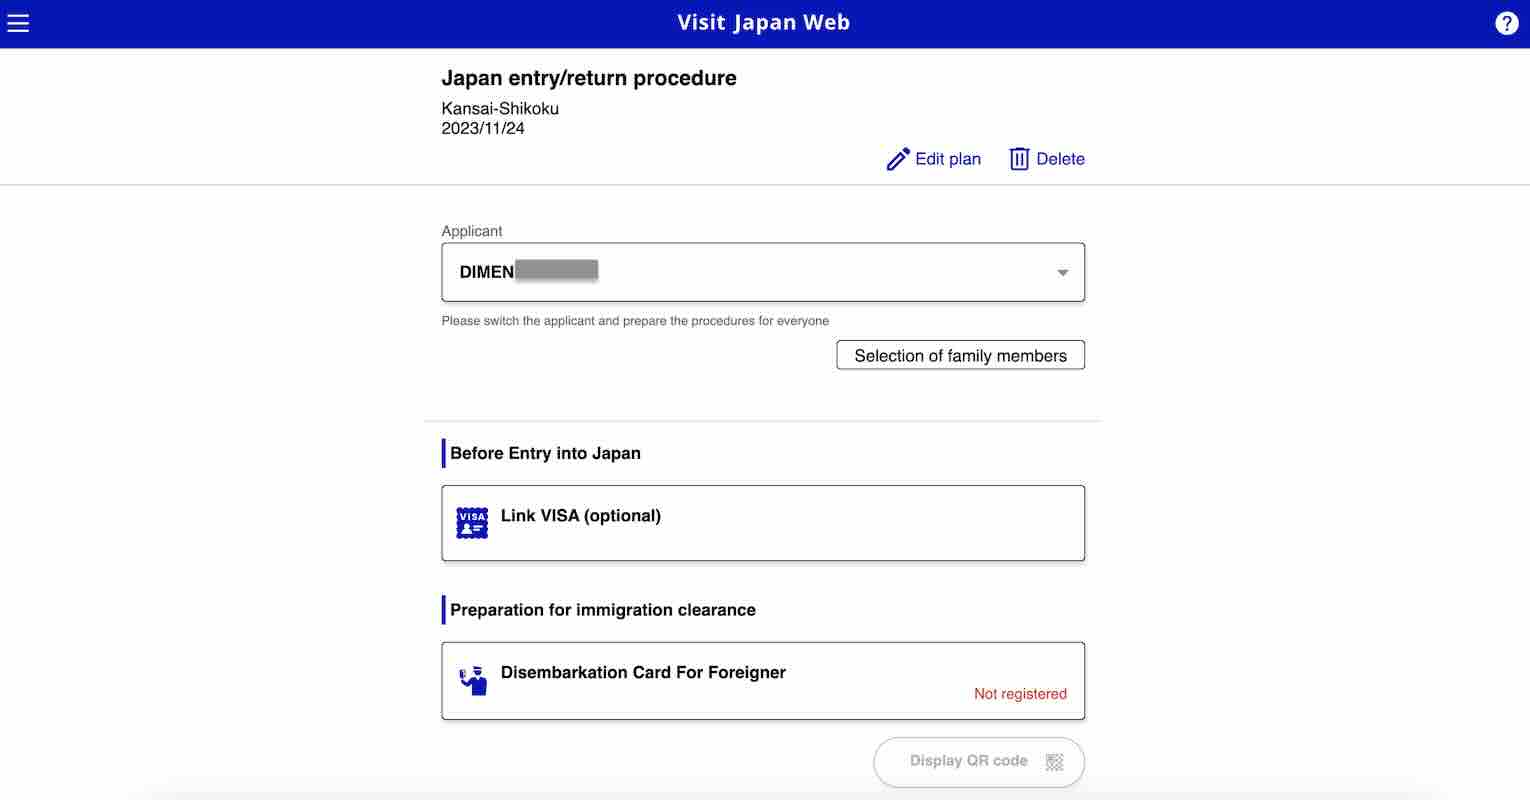
Click “Disembarkation Card for Foreigner”. This is the form you’d typically fill out manually before landing. On the pop-up window, click “Next” to start your registration process.
Here are the details you need to fill out:
- Home Address
- Purpose of Visit
- Last Flight Number
- Duration of Stay
- Prefecture
- City
- Address
- Hotel Name
- Contact Number
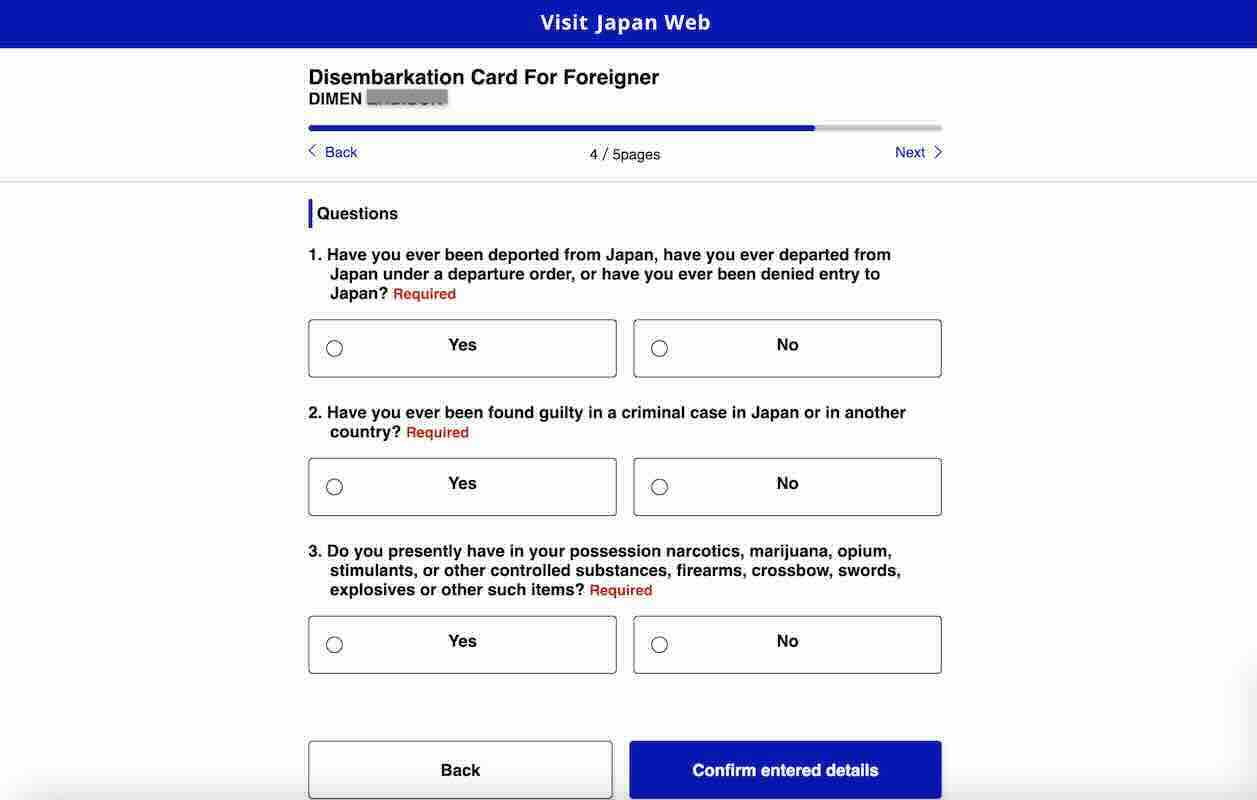
After entering all these information, click “Next”. Then you’ll need to answer a few questions. Once everything is set, click “Confirm entered details”.
On the next page, you’ll be shown a summary of all the details you entered. If everything is correct, click “Register”. Then click “Back to Entry/Return” to proceed to the next step.
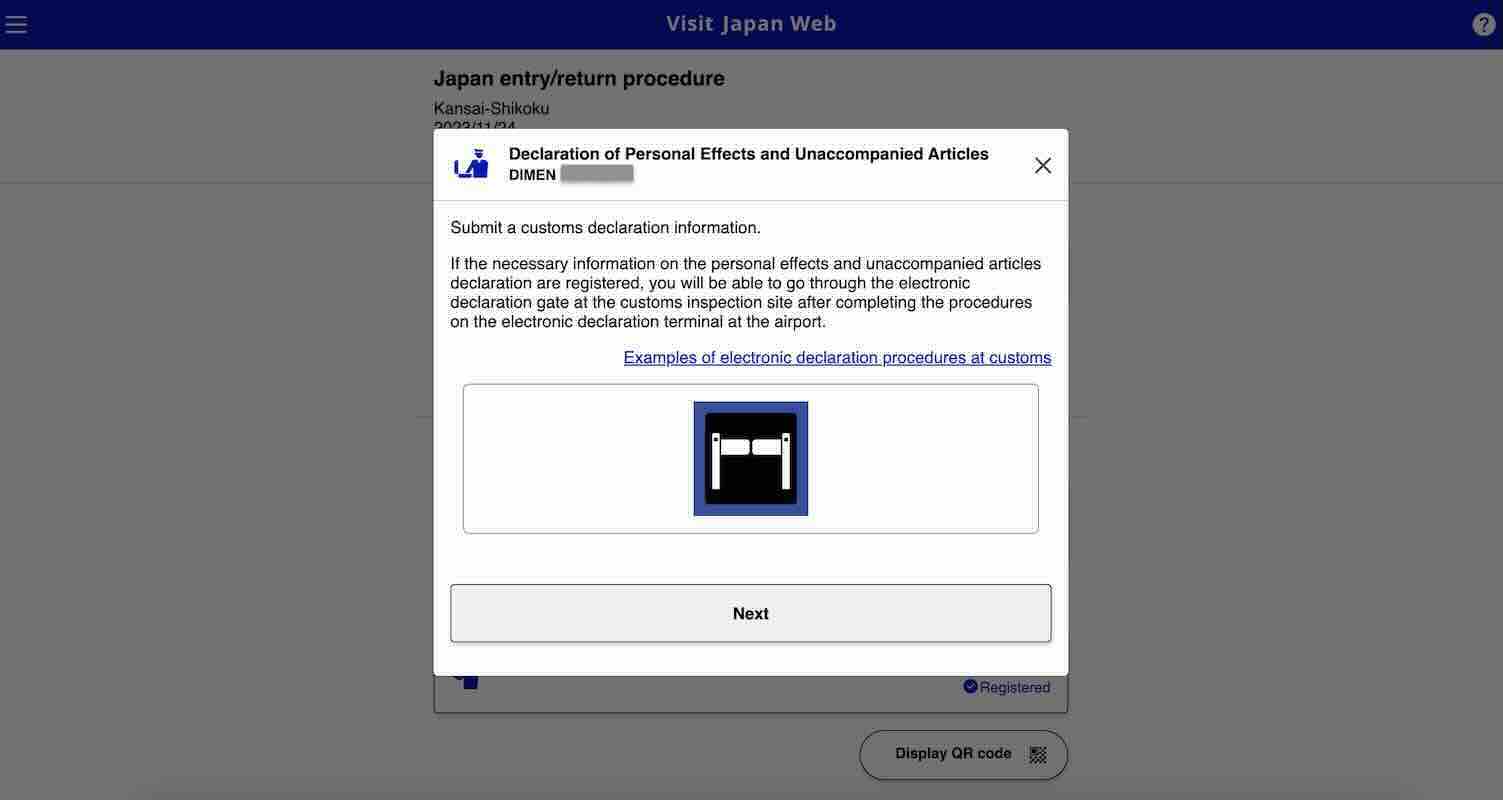
11. Generate QR code for customs declaration.
On a pop-up window, you can read about how the electronic customs declaration works. Once you’ve read the details, click “Next” to start filling out the form.
Below are the details you need to submit:
- Occupation
- Date of Arrival in Japan
- Flight No./Name of Vessel
- Point of Embarkation
After typing in all the required details, click “Next”.
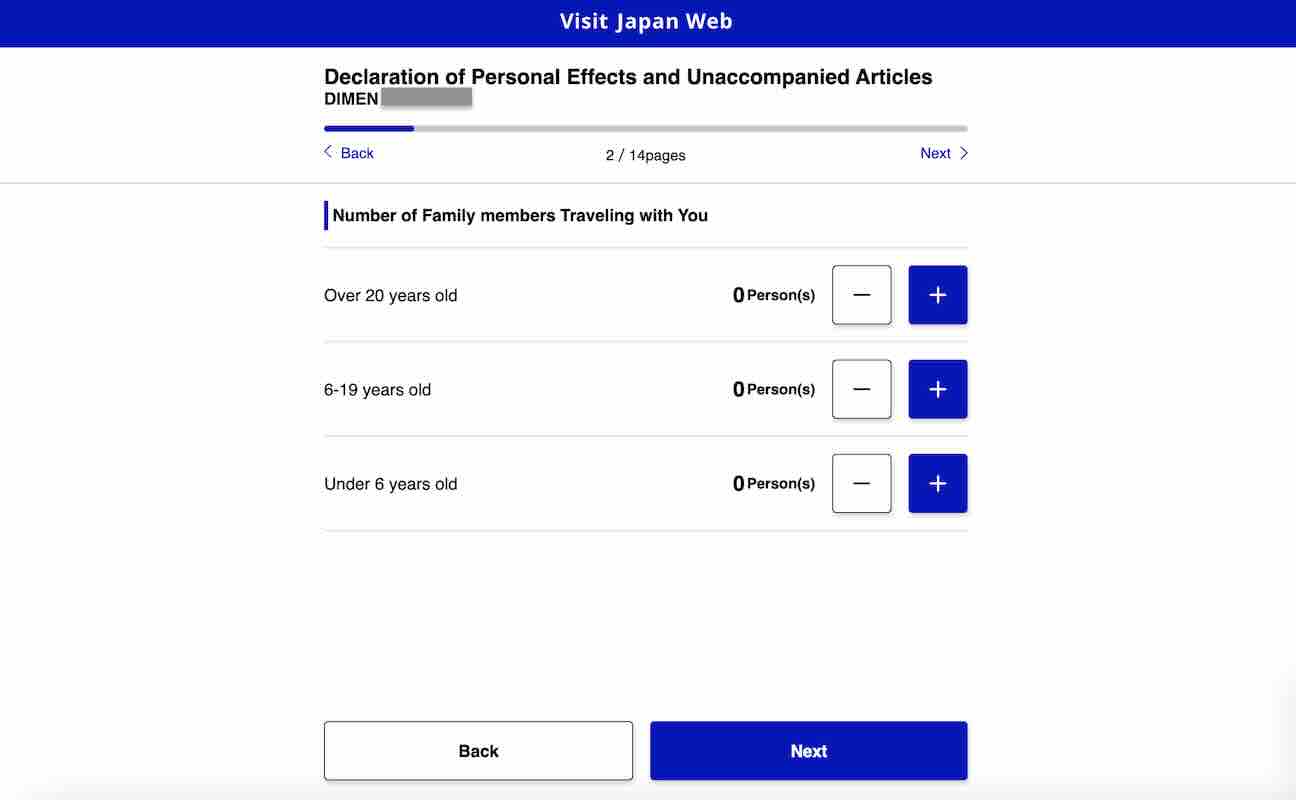
On the next page, you need to enter the number of family members traveling with you. If you’re not traveling with any family, just leave them at zero (0) and click “Next”.
11.1 Declaration Information
In this section, you’ll answer questions about items you’re bringing into Japan. Among the prohibited items are firearms and explosives. There are also restricted items including meat products, fruits, vegetables, and plants. Read every item to be informed about the restrictions and other information you need to know for customs declaration.
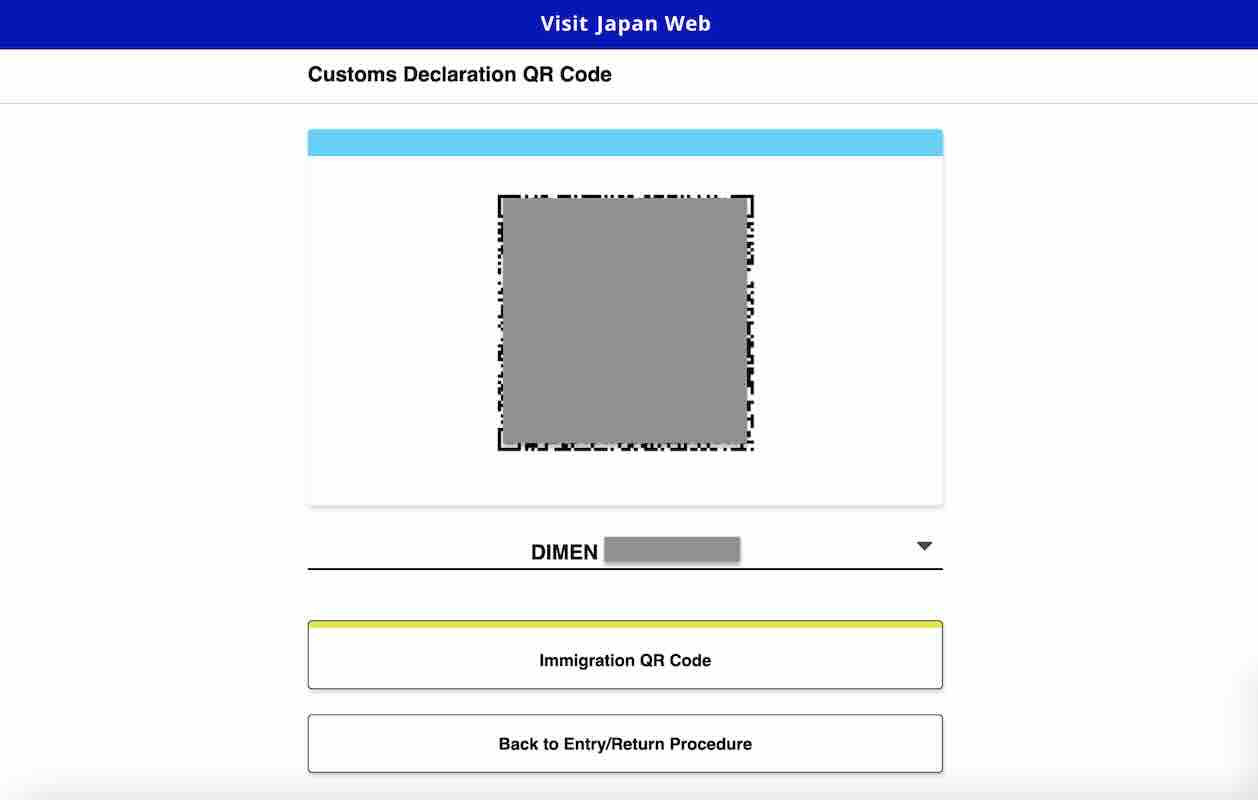
Once you’re done, click “Next” to generate your QR code for customs declarations.
Have Peace of Mind While Traveling!
Getting a travel insurance is optional, but we highly recommend this, especially when traveling abroad. Travel can be unpredictable, and though we hope we’ll never use it, having it gives us peace of mind in case of unexpected delays, cancellations, or emergencies.
For international destinations, consider PGA Sompo’s TravelJOY Plus insurance. You can GET IT HERE. Don’t forget to use WORTHIT for a special affordable rate.

Updates Log
2025 4 25 – First uploaded